


↓こちらのサイトを参考にして、オリジナルのキーボードを作ってみました。
テキスト入力エリアをタップすると、オリジナルのキーボードが出てきました。
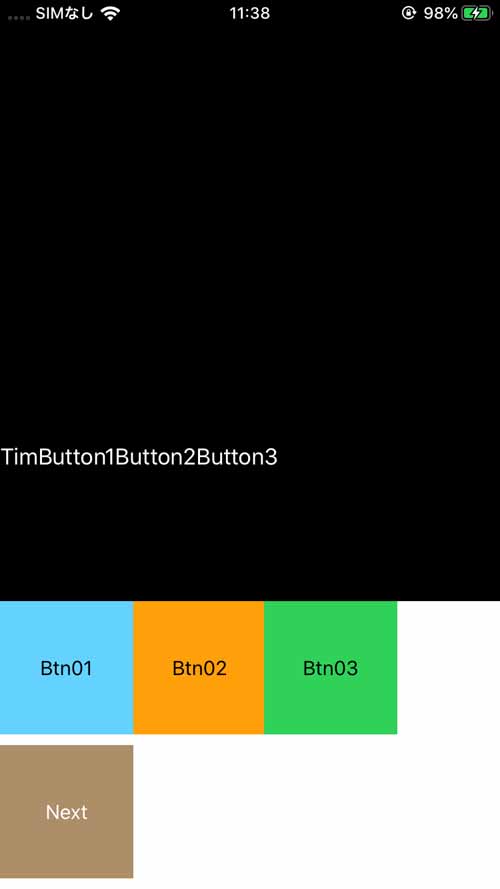
ボタンを押すと、テキストが追加されます。
「Next」ボタンを押すと、別のキーボードに遷移します。
import UIKit
class KeyboardViewController: UIInputViewController {
@IBOutlet var nextKeyboardButton: UIButton!
@IBOutlet var button1Button: UIButton!
@IBOutlet var button2Button: UIButton!
@IBOutlet var button3Button: UIButton!
override func updateViewConstraints() {
super.updateViewConstraints()
// Add custom view sizing constraints here
}
override func viewDidLoad() {
super.viewDidLoad()
let v = UINib(nibName:"KeyboardViewController", bundle:nil).instantiate(withOwner: self,options:nil)[0] as! UIView
self.inputView!.addSubview(v)
}
override func viewWillLayoutSubviews() {
self.nextKeyboardButton.isHidden = !self.needsInputModeSwitchKey
super.viewWillLayoutSubviews()
}
override func textWillChange(_ textInput: UITextInput?) {
// The app is about to change the document's contents. Perform any preparation here.
}
override func textDidChange(_ textInput: UITextInput?) {
// The app has just changed the document's contents, the document context has been updated.
var textColor: UIColor
let proxy = self.textDocumentProxy
if proxy.keyboardAppearance == UIKeyboardAppearance.dark {
textColor = UIColor.white
} else {
textColor = UIColor.black
}
self.nextKeyboardButton.setTitleColor(textColor, for: [])
}
@IBAction func buttonNext(sender: AnyObject) {
self.advanceToNextInputMode()
}
@IBAction func button1(sender: AnyObject) {
let proxy = textDocumentProxy as UITextDocumentProxy
proxy.insertText("Button1")
}
@IBAction func button2(sender: AnyObject) {
let proxy = textDocumentProxy as UITextDocumentProxy
proxy.insertText("Button2")
}
@IBAction func button3(sender: AnyObject) {
let proxy = textDocumentProxy as UITextDocumentProxy
proxy.insertText("Button3")
}
}